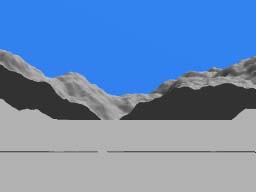
Click here to go Back Of course you could just wing it from here, add a water plane and then move it to whatever level looks best. For you detail-oriented people, however, here's a more precise way of setting your ideal water level. Select the valley terrain and go back into the terrain editor. Use the clipping bracket (waaay on the right side of the screen. Looks like a bracket. Neat, huh?), and pull it up at the bottom bit by bit. Gradually you'll see your intended river fill with color to indicate the area being clipped. Tweak this until your river's about the width you want it to be, then hit the checkmark to accept the changes. Now, back in Bryce proper, what you want to do is go to a side view of your valley terrain. Don't use the trackball to do this -- select the new viewpoint, using the view selection doohickey (just under the nano preview window). Zoom in so you get a nice close-up of the terrain. Can you see the flat, clipped bottom-edge of the terrain? If not... maybe it's underground or something. Turn Underground off, or just drag the valley terrain up a bit so you can see. If you rendered the side view right now, it'll look something like this (depending on which side view you picked):
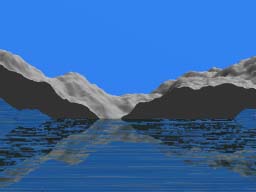
NOW, finally, create the water plane. It'll pop into being, probably rather higher than you want it to be. Use the Edit controls (or the Attributes dialog box) to move it on down so it's at the SAME level as your clipped bottom edge of the terrain. This will make the river fill the exact area you indicated through the terrain clipping. Now if you rendered it in side view, it'll look vaguely like this:
Okay, now. Select your terrain again, edit it. Once again you see the valley from above with the clipped area marked by color. Drag the clipping bracket back to the original location, so that the terrain is no longer clipped at all. This way you still have the riverbed beneath the water surface. Click the checkmark and get out of side view so you can see the valley more normally again.
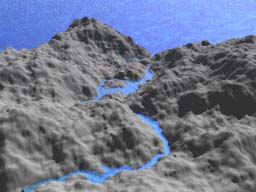
A River Runs Through It Here's a test render from the same viewpoint used before, but now there's water. Doesn't look too bad, does it?
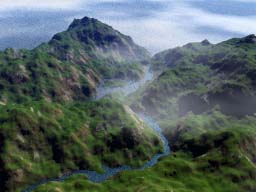
That's all, folks! Now add texture to your terrain and weather and so on and so on. You know how to do all THAT stuff.... riiight? Of course I chose a more aerial viewpoint so you can better see the river, but I could have gone on down and taken some eye level pictures too. It all depends what you're looking for, really.